How To Hand Wash Bras Quickly And Easily
|
If you're not happy with your first pair of underwear after trying it on, let us know.
We'll send a new size or color, or give you a refund. No returns needed.

Paulina Kwik
|
In today’s episode of how to live more sustainably, I’m gonna cover a topic you should most definitely be doing: hand washing bras! Before I get into the nitty gritty of when and how to hand wash bras quickly and easily, let me tell you why it matters. Not only is it better for the planet to hand wash those bras (and bonus points if they’re already made of sustainable fabrics !), it will also make them last much, much longer. (Which is also better for the environment, too. It’s an all-around win).
And hey, once you find a bra that you like, you want it to keep doing it’s job. That puppy keeps your boobs supported and happy, just like a good pal. And you should treat your pals well in return!
Read on for the why, the where, and the how to wash bras. Whether you prefer a triangle bralette or a racerback bralette , this little guide will make you a pro at hand washing bras—and those bras, in return, will keep workin for ya. It’s a mutually beneficial setup!
So, what are you waiting for?? The time is now! Let’s learn how to hand wash bras.
I know, I’m adding more to your already endless to-do list, but the benefits to hand washing bras totally make the extra time (which is not a lot, I promise!) WORTH IT. First of all, finding that perfect bra that supports and lifts and is comfortable is like finding the Holy Grail—when you find it, you never want to let it go! Of course, hand washing won’t make it last forever, but will definitely extend the longevity.
The other major perk to hand washing is that it’s the much greener option. Here’s why:
So, hand washing bras is not only more sustainable than using a washing machine but it also preserves your bras for a much longer time. That’s good news for both the earth and your bank account! Follow these steps on how to hand wash bras and you’ll have fresh and clean undergarments in no time.
Here’s a super user-friendly guide for how to hand wash bras quickly and easily, to keep those bras workin’ hard (not hardly working!) and making you feel a little better about your environmental footprint.
Here’s what ya need to hand wash bras:
Now that you’ve gathered all your materials, it’s time to get your sink set up for washing those bras. Choose a sink that plugs—usually a laundry or bathroom sink—and give it a good wash if you haven’t yet.
If your sink doesn’t have a stopper, you can always place a jar or bowl filled with water over the hole. Fill the sink with warm water, not hot! This is key, because hot water actually is harder on your clothes (not to mention your hands). Warm water will get the job done without excess damage.
Now, make sure to double check the labels of those bras to make sure they aren’t dry clean only! If you aren’t sure, you can do a quick home test: dab a drop of water on the fabric. If the color doesn’t bleed, or if there isn’t a water spot, you should have the green light.
If any particularly delicate bras have specific instructions, lump them together to be washed as a set. And don’t forget to separate your darks from your lights!
Once your sink is filled with water and you’ve double checked the labels, it’s time to get sudsy. Pour 1-2 tablespoons of your regular laundry detergent (preferably a sustainable laundry detergent, such as hemp soap ) to start, into the sink.
You can play around with this amount depending on the size of your sink and how many bras you’re washing. Now, swish swish swish, until the soap is dissolved into the water.
Now, add the bras! Do a quick check for stains—the straps or the underarms are common spots—and pre-treat by adding a little extra detergent. Then, it’s time to swish again!
Swish your bras in the sink until they’re coated in the soapy water. Let those babies chill in the soapy water for anywhere from 15 minutes to an hour—I find about 45 minutes does the trick!
After you’ve let your bras soak up some of that soapy goodness, it’s time to rinse. Swish again, then as the sink is draining, rinse through with cold water. Make sure the water is running clear, and the bras don’t feel slippery—otherwise, there will still be soap residue! No bueno.
After you rinse completely, gently squeeze your bras over the sink to get rid of any extra water. Do not, I repeat, do not wring out your bras or rub them aggressively! This will make them lose their shape, stretch out, and cause that very wear and tear we’re trying to avoid.
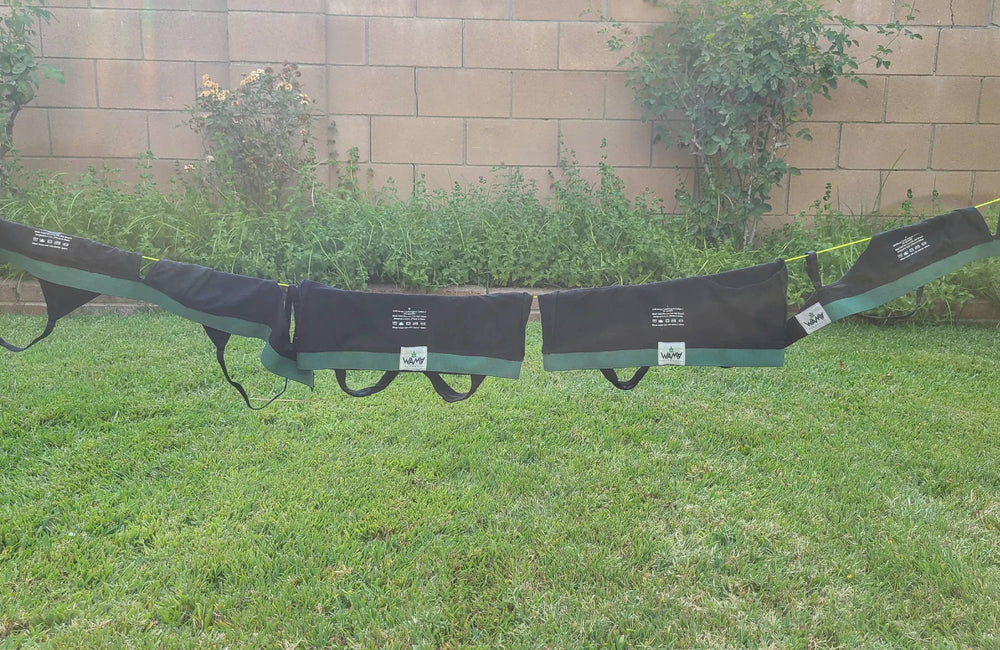
Speed up the drying process by pressing each bra gently between a folded up towel before hanging to dry. Then, hang them somewhere with decent air flow (and wherever you have space). A clothesline or clotheshorse is ideal, but hangers or even your shower rod can work in a pinch. Hang your bras from the center, not the straps! Wet straps will stretch out and well, those are kinda important for fit.
You can also lay your bras or bralettes flat on a towel, but you’ll probably need to switch out the towel to make sure they dry well. Most bras will dry in one day, but some may take up to two days. If you live in a particularly humid place, you can always use a fan to speed the process up, although that’s not the most eco-friendly way to do it. Still, if it helps them from getting mildewy and needing to be washed again, it could be worth it.
And… that’s it! Now, young grasshopper, you are free to go forth and (hand) wash that awesome hemp bra of yours.
Hand washing your bras and bralettes is really a breeze, and it’s a great way to take care of clothing that gives you so much support! Here are a few other hacks to keep in mind when hand washing your bras:
If you’re washing a big load of bras, here’s a pro tip: Bust out your salad spinner for an easy pre-dry before hanging your bras. You can throw one or two in at a time and spin them just as you would fresh greens. (And it probably goes without saying, but just in case—wash out the spinner before you use it for greens again, mmk?)
It’s super important to hang your bras the right way, or the fabric will get more wear, and that totally defeats the purpose of all of this! Draping them by the middle, or spread out on a towel, is best. To hang them from a clothesline, don’t hang them by the straps! Rather, hang them by the middle so the straps hang down, and clip from there.
Now, if you love the environmental impact of that hand wash bra life, but you’re not loving the results… as in, your bra cups are folded all weird, or the inserts are never the same after washing?
The solution is to reshape your bra before you hang them to dry. The easiest way to do this is to lay them on a towel in exactly the shape you want them to be, molding the cups and inserts if necessary. Then hang as needed to keep drying.
As explained in WAMA’s guide on how to fold underwear , properly storing your delicates extends their life and saves you time when getting dressed. To store bras effectively, stack cupped bras against one another and lay cupless bralettes together. Arrange them by color, too. Not because this extends life, but because it will make your life easier! And it will make your drawer prettier, too. #priorities
If you’re doing this every other day, it can be a little time consuming. Wait until you have a few dirty bras or bralettes before plugging that sink and washin’ away. However, don’t wait too long! If you wash all of your bras at once, the dry time of up to two days could leave you without a bra, leading to a sticky (er, damp) situation. (Ask me how I know this).
Of course hand washing is best, but hey, life happens. Sometimes you just gotta throw those babies in the washing machine and cross your fingers and maybe send up a prayer or two to whichever god/goddess/deity you choose. Here are some tips if you absolutely must use the washer:
More questions? I got ya! Here are some of the most commonly asked questions regarding how to hand wash bras:
Let’s be honest, we’ve all been guilty of wearing a bra way past its prime. The truth is, dirty bras harbor all sorts of funky bacteria, sweat, grime, and more, so it’s important to wash them regularly. Experts recommend washing your bra every 2-3 wears—more often in the summer, since, well, you sweat more! On the flip side, you can get away with more wears in the winter, depending on your activity level.
Yes! However, you should wash them after every use, since your hiking bras or other workout bras are likely to be super sw
Scrubbing the spot with some detergent should do the trick, as explained above. If not, you can try a little baking soda (this can also help with really stubborn odor). Do a small spot check to make sure it won’t mess up the fabric, but likely it won’t! If you’re still worried about odor, adding some white vinegar while soaking the bras can help, just make sure to rinse extra. For deodorant specific stains, read how to get deodorant stains out of bras .
Most def! Here’s how to hand wash underwear , for some more specific tips.
I always recommend eco-friendly detergent. Normally, I just use whatever flavor of Dr. Bronner's hemp soap I have on hand. There are tons of types on the market, and you can even make your own, if you’re up for that sort of thing.
NOPE NOPE NOPE. That’s a surefire way to damage them, or even other clothes if those tricky little eye hooks go rogue and snag ‘em!
So! There you have it. Now you’re a certified expert(ish) in how to wash bras. Do the right thing for the earth and your undergarments: hand wash to preserve energy and water and keep your bras in tip-top condition.
Do you hand wash your bras? If not, would you give it a try? Let me know what you think in the comments.
Get updates on restocks, new color and size releases, and upcoming product launches. You’ll also get a 15% discount on your first order of hemp underwear.


